FGT think your best choice in the future
System Integration Designers in FGT
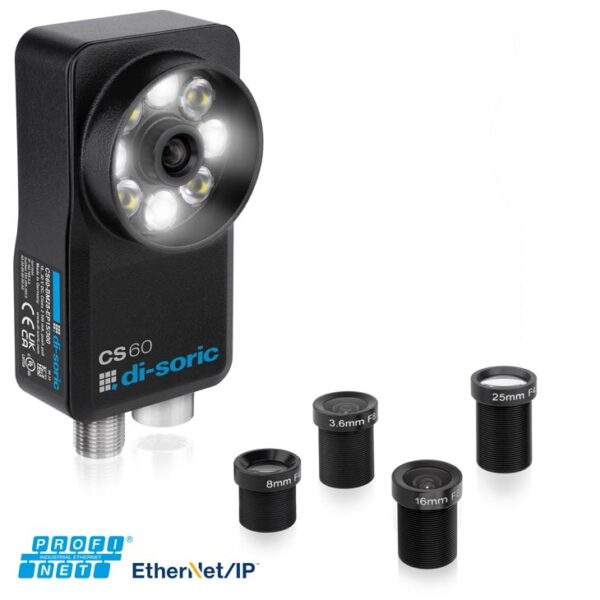
Machine Vision System | CS Series | Integrated Vision Sensor | DISORIC
German manufacturer DISORIC (First General Machinery Co., Ltd.) | 18 years as the sole distributor | Practical engineering experience with PLC engineering technology | Machine vision systems | CS series | Integrated vision sensors
The CS-60's software-integrated image correction and calibration functions optimize image quality, ensuring excellent results and high read rates when measuring and capturing code. Convenient logical connections between tools, as well as versatile Profinet or EtherNet/IP connectivity with existing PLC modules, make the CS-60 even more flexible.
- Description
- Additional information
- Product Specifications
- Product accessories and software
- Special needs
- Inquire now
Machine Vision System | CS Series | Integrated Vision Sensor | DISORIC
Advantages and characteristics
The CS-60 vision sensor series offers exceptional flexibility, enabling maximum productivity in detection, identification, and inspection tasks.
With simple lens changes and integrated high-performance LED illumination, the CS-60 produces excellent images in terms of distance, field of view, and resolution. A wide range of optical accessories, including various lens filters, assists you in demanding tasks such as quality detection, highly reflective objects, or constantly changing ambient light.
Industry-leading high read rate algorithm
These comprehensive tools can be easily expanded through software upgrades and customized as needed. The CS-60's software-integrated image correction and calibration functions optimize image quality, ensuring excellent results and high read rates when measuring and capturing code. Convenient logical connections between tools, as well as versatile Profinet or EtherNet/IP connectivity with existing PLC modules, make the CS-60 even more flexible.
Save development time
A clear, intuitive, and easy-to-use user interface, along with high-performance tools continuously optimized for the highest quality and efficiency, helps users save time.
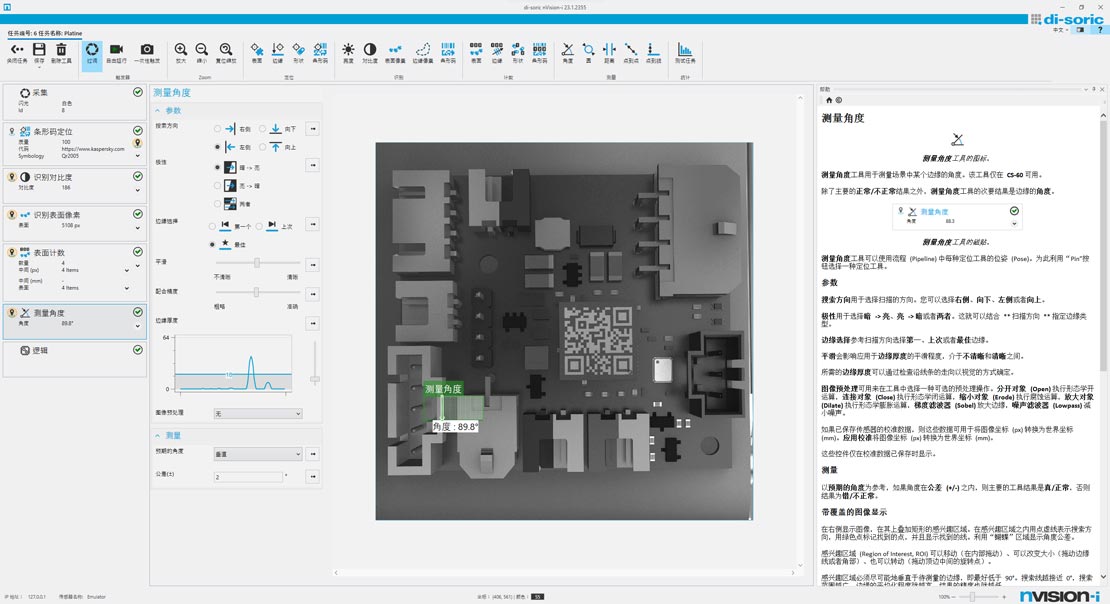
Visualization of the pipeline
The various tasks are interconnected within the logic tools, enabling the application to achieve extremely high flexibility and processing speed during implementation.
You can insert inspection tools here and move them by dragging and dropping.
This section displays the measured values and inspection results/inspection status.
Intuitive user-friendly navigation menu
Context-sensitive assistance can be displayed when necessary.
The menu navigation is available in 7 languages.Chinese, German, English, French, Italian, Spanish and Korean)
Logic tools
Associate the results with the output.
By freely correlating the results of multiple tools, a single overall result is obtained directly in the vision sensor, thereby achieving superior performance without increasing the load on the PLC.
Another advantage is its high flexibility:
Measurements or results can be addressed at any point on the Profinet fieldbus.
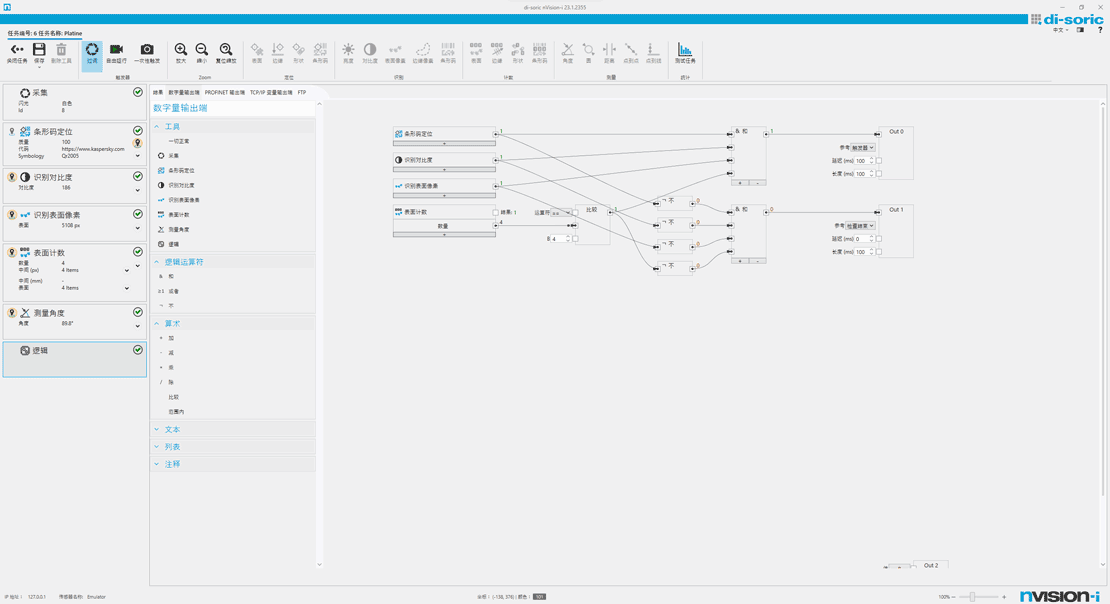
Quick to learn and use, no training required: Graphical logic tools
Based on Functional Graphs (FDPs), even extremely complex functions can be clearly displayed. This allows for simple and easy-to-understand implementation of input and output behaviors.
This eliminates the need for training, as the operating procedures are already familiar from the daily processing of PLC programming.
Image correction and calibration
Integrated Image Optimization
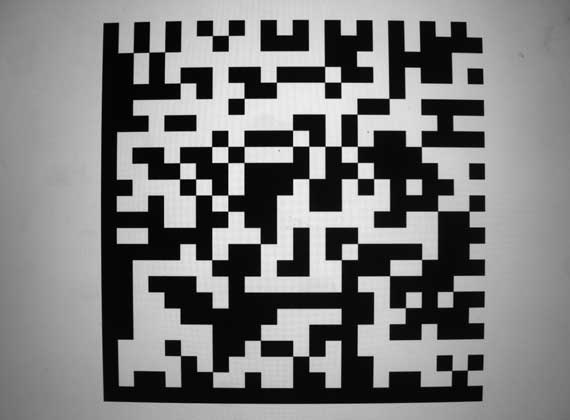
Calibration via nVision-i can be performed with just two clicks, easily eliminating distortion and shadows at the edges of images. Therefore, the vision sensor is capable of converting pixel values to precise actual values (in millimeters) across the entire field of view and outputting them.
In addition, the CS-60 can meet the requirements of fields where flexibility, ease of configuration, and rapid conversion are crucial.
Visualize the inspection results in a web browser.
The display of test results in a web browser is easy to understand, even for untrained employees, and has become an indispensable tool in the monitoring process. Our vision sensors' web interface is compelling because it provides a complete overview through tools that directly display measurements and borders within the image.

Process and Status Detection
- Display inspection tools
- This section displays the measured values and inspection results/inspection status.
The results show
- green box and: normal
- Red box and: Abnormal

Visualization
- Use checkboxes to visually filter the visualization tools and their results in the image window:
Simply turn the area and results you want to display on or off. - The examination results are displayed directly in the imaging window.
Historical records
- Displays inspection history and status.
- You can review past recordings again.
Easily access via IP address
Open a web browser, enter the IP address, and return—the image processing toolset and its results are displayed without any further steps. Live view allows you to directly view the currently captured images in the vision sensor's field of view, as well as the history of image acquisition—filtered by successful and unsuccessful checks.
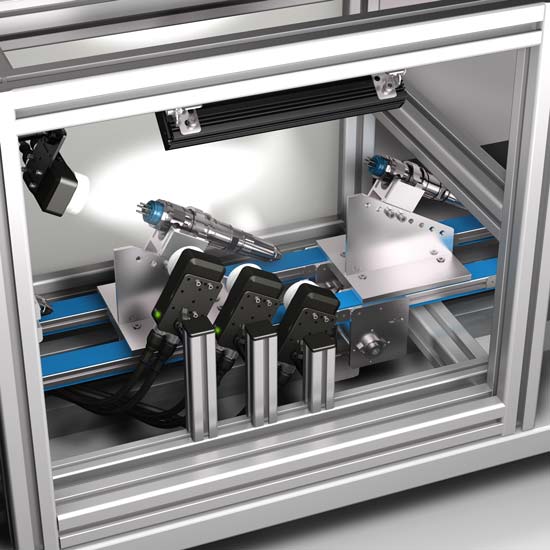
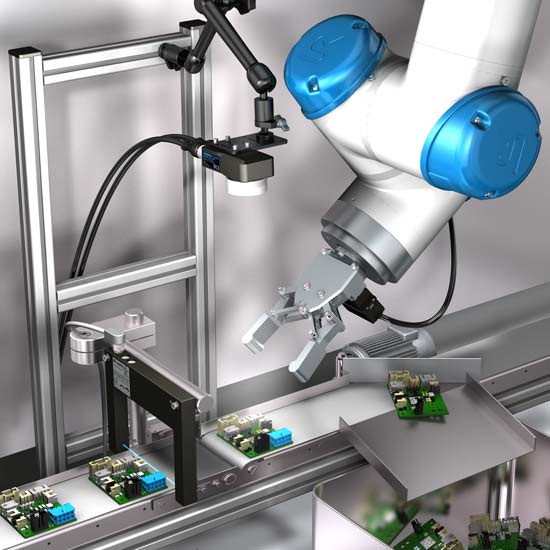
What is machine vision?
Machine vision (MV) refers to an imaging-based method for automated inspection and analysis, widely used in industrial automation inspection, process control, and robot guidance. It encompasses various technologies, software and hardware products, integrated systems, motion, methods, and expertise. As a system engineering discipline, machine vision is considered distinct from computer vision, which belongs to computer science. It attempts to integrate existing technologies in new ways and apply them to practical problem-solving. The entire machine vision process includes planning requirements and project details, followed by solution development. During system execution, imaging begins, followed by automated image analysis and extraction of necessary information.
Main application areas
Machine vision technology is widely used in industrial production and automation scenarios:
- Automated Optical Inspection (AOI): Detects defects, flaws, or incorrect assembly on the surface of a product.
- Quality control: Ensure that the product size, shape, or color meets the standards.
- Positioning and guidance: Guiding the robot to accurately grasp, place, or assemble parts.
- Identification: Reading barcodes, QR codes, text, or identifying objects.
- Measurement: To perform precise, non-contact dimensional measurements of an object.
Difference from Computer Vision
Although the two are closely related and their technologies overlap, their focuses are different:
Machine vision: focuses more on practical applications in industrial automation, emphasizing system integration, stability and efficiency to solve specific engineering problems.
Computer vision: focuses more on theoretical research and algorithm development. It is a branch of artificial intelligence and aims to enable computers to "understand" image content and simulate the complex visual cognitive abilities of humans.

Automated Optical Inspection (AOI) is a high-speed, high-precision optical imaging inspection system that uses machine vision as the standard inspection technology. It improves upon the shortcomings of traditional manual inspection using optical instruments. Its applications range from R&D and manufacturing quality control in high-tech industries to defense, consumer goods, medical care, environmental protection, power, and other fields.
Automated optical inspection is a common and representative method in industrial processes. It uses optical instruments to obtain the surface condition of finished products, and then uses computer image processing technology to detect defects such as foreign objects or pattern anomalies. Because it is a non-contact inspection, it can be used to inspect semi-finished products in intermediate processes. High-precision optical image inspection systems encompass fields such as measurement lens technology, optical illumination technology, positioning measurement technology, electronic circuit testing technology, image processing technology, and automation technology applications. Its development and application not only meet the needs of high-tech industry development, but its technology can also be extended to the defense and military industry. For example, the manufacturing of military weapons, night vision combat systems, and the analysis and assessment of strategic terrain features are all closely related to this imaging technology.

| Types of | Electronic |
|---|---|
| Installation method | Thread |

